Sweet Charity: Difference between revisions
m →Sound 2 |
Smacluskie (talk | contribs) No edit summary |
||
| (6 intermediate revisions by 2 users not shown) | |||
| Line 1: | Line 1: | ||
[[Category: Productions]] | [[Category:Productions]] | ||
[[Category: Musical Theatre]] | [[Category:Musical Theatre]] | ||
[[Category: | [[Category:New Athenaeum]] | ||
| Line 170: | Line 168: | ||
Below is a group of screen shots from what we can see through the headset: | Below is a group of screen shots from what we can see through the headset: | ||
[[File:VR Fly around video.mov|left|thumb|VR Flythrough Video]] | |||
[[File:Fcbdde60f2214745831946246f7b325c.JPG|300px]] [[File:F343d220981641c586187f23d4fa6a63.JPG|300px]] | [[File:Fcbdde60f2214745831946246f7b325c.JPG|300px]] [[File:F343d220981641c586187f23d4fa6a63.JPG|300px]] | ||
| Line 207: | Line 209: | ||
===Sound 2=== | ===Sound 2=== | ||
[[File:SC24 - VoidPhoto1.jpeg| | [[File:SC24 - VoidPhoto1.jpeg|570px|left|alt text]] | ||
[[File:SC24 - VoidPhoto2.jpeg| | [[File:SC24 - VoidPhoto2.jpeg|570px|right|alt text]] | ||
After a few revisions this is the final set up of the void that I used. This set up allowed for easy monitoring of the mics and the ability to quickly respond to any issues. Due to the extra amps that where located in the void I had to secure the lighter UHRF rack on top of the Axient rack with a ratchet strap. This set up gave me a cubby to have the Ath Mac running Wavetool server and Wireless Workbench. During show runs I would have workbench open on the monitor page which allowed me to easily mute actors when required. I also had my personal laptop connected running Wavetool remote for monitoring RF signal, SCP and communicating with FOH. | |||
Due to some system limitations I was unable to have Dante connected to all mics for monitoring on Workbench, therefor I opted to just listen directly from the racks, this worked fine for me. Having the desk space with everything laid out was a massive help when dealing with sweated out mics. A can of compressed air was my most used tool on this production. | |||
| Line 216: | Line 222: | ||
<pdf width="600" height="450">SC24_-_Pack_Labels.pdf</pdf> | <pdf width="600" height="450">SC24_-_Pack_Labels.pdf</pdf> | ||
Revision as of 10:55, 8 November 2024
| Sweet Charity | |
|---|---|
| Summary | |
| Dates 17th - 22nd June 2024
| |
| Location New Athenaeum
| |
| Creative Team | |
| Lighting Designer | |
| Sound Designer | |
| Production Team | |
| Head of Stage | |
| Head of Flys | |
| Deputy Stage Supervisor | |
| Production Carpenter | |
| Stage Manager | |
| Deputy Stage Manager | |
| Assistant Stage Manager | |
| LX Programmer | |
| Associate Lighting Designer | |
| PLX | |
| Production Sound Engineer | |
| Sound No.1 | |
| Sound No.2 | |
| Technical Stage Technicians | |
| LX Technicians | |
| Sound Technicians | |
Overview
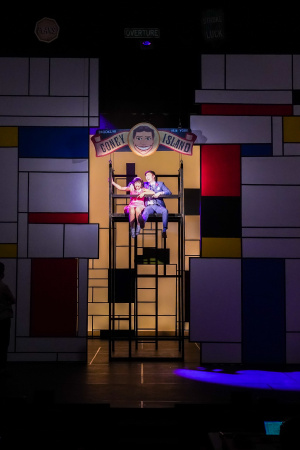
"Sweet Charity" is a classic Broadway musical that tells the story of Charity Hope Valentine, a dance hall hostess with a heart of gold, who dreams of finding true love and escaping her dreary life in New York City. Despite facing constant disappointments in her romantic relationships, Charity remains optimistic and resilient, always hopeful for a better future. Along the way, she encounters a colorful cast of characters, including her fellow dancers, eccentric suitors, and quirky acquaintances. Filled with lively dance numbers, memorable songs, and humorous moments, "Sweet Charity" is a tale of love, perseverance, and the pursuit of happiness in the bustling cityscape of the 1960s.
Technical Stage Department
This show had to be very sharp and clean and minimal crew on stage. This in tern lead to some very technical systems which we therefore used in this production. The sliders which made up every scene were automated using the BigTow winches and the Epic desk. The Ballet Barres were in their own onstage track using a truck winch, to mirror the movement for symmetry. The Tower was on Kinesys to provide a hidden reveal behind the sliders.
Automated Sliders
The entire show depended on 4 sliders that move across the stage, creating different shapes and movements to frame each scene. I very early on decided for accuracy and repeatability this needed to be automated. But also for "neatness" as if it was on rope we would never coordinate 4 operators perfectly every time.
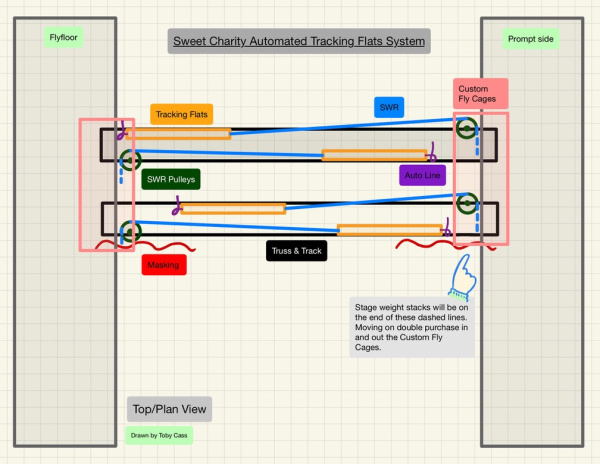
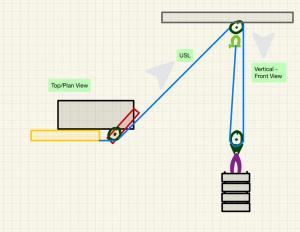
Concept Drawings for Slider System
Below are the original concept drawings and brainstorming ideas I had whilst coming up with the system. It turned out not too dissimilar to these but not exactly the same.
Counterweight Cradles
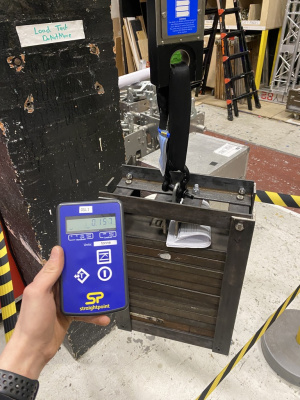
After some more brainstorming I decided than rather doing a double purchase CW system on the other side of the automation. That I would go with a 1:1 meaning the weights had to have 12m of movement. Because the weights were traveling so far I wanted a way to guide them, so they don't build up wobble etc. Therefore, I built some CW cradles and rated them, which can then be a product for future use as it holds the in house fly weights.
Below are some images of my build process and then how they looked rigged in the system:
Because these cradles were now coming down to floor level, we built some temporary boxes that go around the landing zone, which enclosed the catenary wires and cradle when it flew in and out at speed. These were 8' tall so no-ones hands could be in danger either. The doors on these were also screwed shut as to make sure no-one could tamper with them. And there were cameras on each corner of the stage too.
Track, Truss and Pulleys
To reave all this system together required a lot of SWR and many pulleys, we managed to borrow a lot of pulleys from NTS. However, again lots of metal work required to get them mountable the way we needed.
The automation used its normal beams and header pulleys on the grid. Which then went down into some divert pulleys along the truss.
The CW side of the system went through pulleys on the truss up to the grid, through another pulley along the grid. Then down again where it attached to the cradle. These two diverts on the grid used 1m sticks of truss to span the gap. The cradle pulleys also had custom made brackets to rig the catenary wires from, which guide the cradles down. These were then tensioned at floor level using turn buckles.
In-Floor Slider Tracks
Because the sliders had a lot of hidden elements to them such as doors, cabinets, mirrors etc. The weight wasn't evenly distributed in an US/DS direction. Which means that if the sliders were to pass each other they would collide. The solution to this is to have a track in the stage for a spade to run in. As our show floor is on 6mm which isn't enough for the spades, we pulled up the stage floor and replaced it too, which meant we could have an 18mm deep track. We then ran 2 PTFE spades per flat which were held down using bungees to spring load them as they cross the smiling stage. An issue we ran into with the spades was because under the stage floor are hard wood pallets, which are made up of hundreds of strips running US/DS so many many joints to cross. This caused the spades to jump and snag. The final solution, was running continuous strips of boning from corsets in 12m lengths in the tracks which is about 1mm deep and 6mm wide. This created a very slippery smooth un-interrupted run for the spades to move along.
[[File:|300px]] [[File:|300px]]
Deck Track (Ballet Barres)
The ballet bars were a huge part of the show and had been in discussion since the very concepts. After options of being flown and raising out the floor were considered, we finally went with another two tracks in the stage with a truck winch for operation to create a symmetrical movement on and off stage. This track used the replaced stage floor as the 30mm opening for the spade to travel in, and the 6mm show floor to close over and create an 8mm visible track opening.
The 4mm SWR was terminated into the spades using copper ferrules as there was no room for any other type of termination.
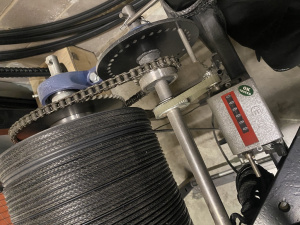
The cables then ran through low relief pulleys in both wings which were flush with the rest of the flooring. And finally into the truck winch shown below:
Auto Desk
VR Vectorworks Odyssey
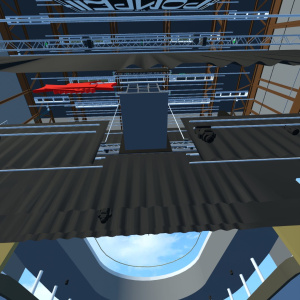
For this show we also had the opportunity to use a VR headset to look around the set in Vectorworks prior to the fit-up, this was very helpful for all departments. Especially for the movement of set pieces and cast entrances.
Below is a group of screen shots from what we can see through the headset:
Flys
GroundPlans
Lighting
</pdf>
Stage Management
Sound
Sound 2
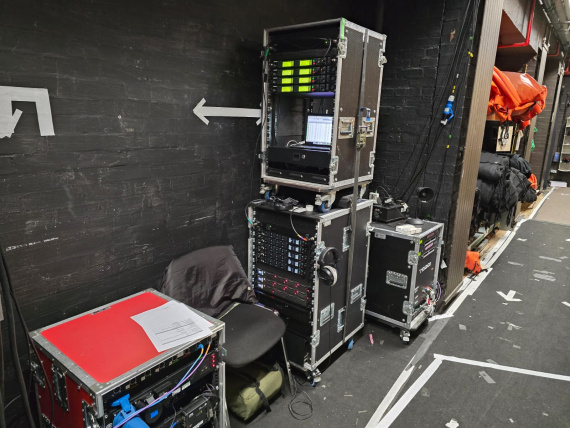
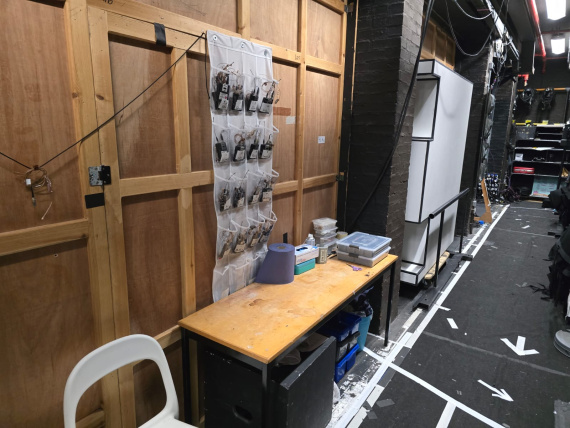
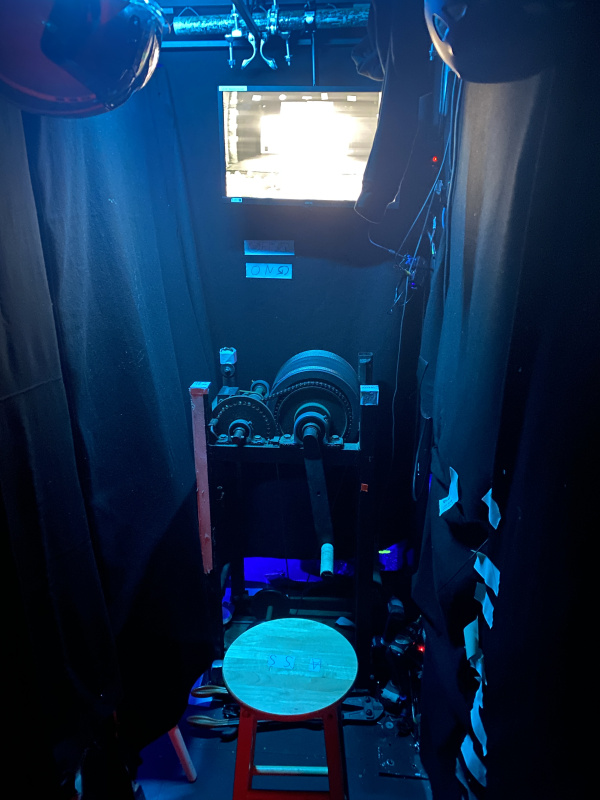
After a few revisions this is the final set up of the void that I used. This set up allowed for easy monitoring of the mics and the ability to quickly respond to any issues. Due to the extra amps that where located in the void I had to secure the lighter UHRF rack on top of the Axient rack with a ratchet strap. This set up gave me a cubby to have the Ath Mac running Wavetool server and Wireless Workbench. During show runs I would have workbench open on the monitor page which allowed me to easily mute actors when required. I also had my personal laptop connected running Wavetool remote for monitoring RF signal, SCP and communicating with FOH.
Due to some system limitations I was unable to have Dante connected to all mics for monitoring on Workbench, therefor I opted to just listen directly from the racks, this worked fine for me. Having the desk space with everything laid out was a massive help when dealing with sweated out mics. A can of compressed air was my most used tool on this production.
