She Loves Me
| She Loves Me | |
|---|---|
| Summary | |
| Dates 3rd - 6th December 2024
| |
| Location New Athenaeum
| |
| Creative Team | |
| Director | |
| Lighting Designer | |
| Sound Designer | |
| Set and Costume designer | |
| Production Team | |
| Stage Supervisor | |
| Deputy Stage Supervisor | |
| Head Of Flys | |
| Technical Stage Technicians | |
| Stage Manager | |
| Deputy Stage Manager | |
| Assistant Stage Managers | |
| LX Programmer | |
| LX Technicians/Spot Ops | |
| Sound 1 | |
| PSE | |
| Sound 2 | |
| Sound Technicians
Sonny Wardrope, Emily Lumley, Skye Bell-Burn, Ravyn MacDonald | |
Technical Stage Department
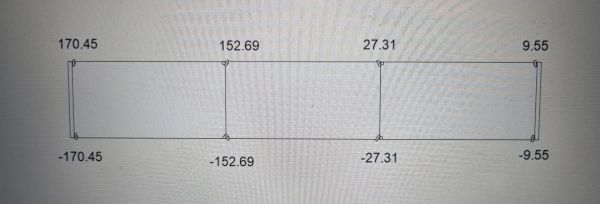
Groundplan
Masking with Truss
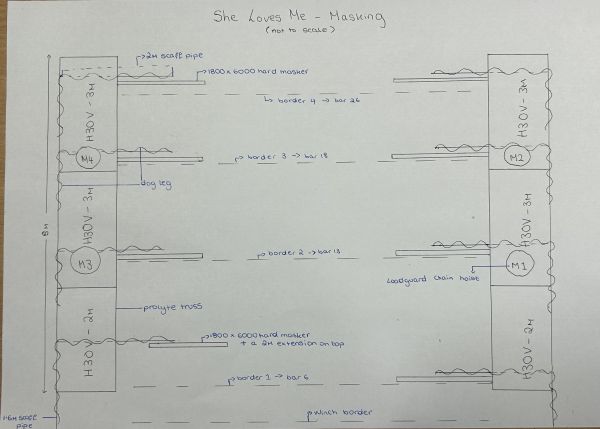
For this show we knew that the design needed hard masking and that this would take up a lot of our hemp lines that we have in stock. Each hard masker needs two hemp lines and we had 8 hard maskers, meaning that 16 hemp lines would already be used. Because of sight lines, due to having large trucks coming off an on from the wings, we knew that we would have gaps in our masking, and therefore would need to use dog legs around the back of each hard masker and borders in front in order to close these gaps. Each dog leg takes another 3 hemp lines, so in total another 24 hemp lines would have to be used. In stock, we only have 24 44m hemp lines, so we wouldn't have had enough for all the hard maskers and dog legs. This is when we thought about using truss. We decided the easiest way to cut down on the amount of hemp lines we were using was to have truss spanning the length of the wing on both SL and SR, hanging on two motors, placed motor down, and have 4 scaff bars coming off of each truss at a 90 degree angle using doughty clamps, in order for the dog legs to go along the truss and across each scaff bar. This means we can use 16 hemp lines for the hard maskers, and the remaining 8 to have pickup points on each end of the border bars, as we have 2m extensions on each of these.
Flys
Fly Plot
Flys Preset Check
Master fly cue list
Kabuki Letter Drop System
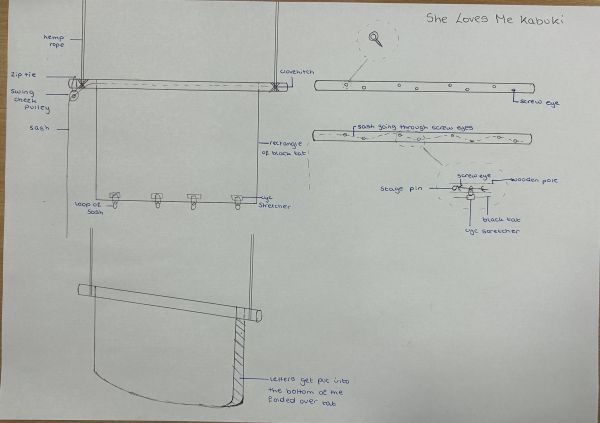
Originally when we thought about how we would do a letter drop system, we decided on simply putting letters in two buckets that were zip tied to a pole with a pulley system, in order to tip the buckets over for the letters to fall out. However this turned out to not work well, as the buckets wouldn't fully tip enough for all the letters to fall out, and also all the letters clumped together instead of spreading and falling nicely. We went away and re thought our plan, and instead decided to create a simple old school kabuki style system.
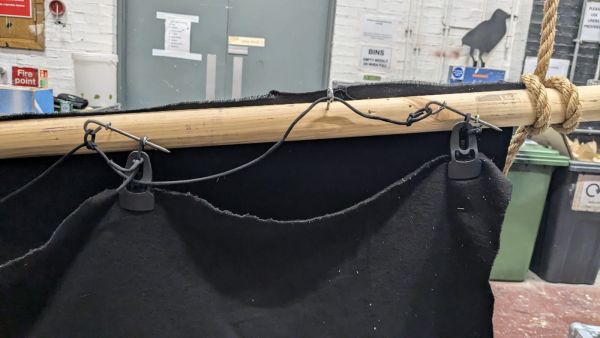
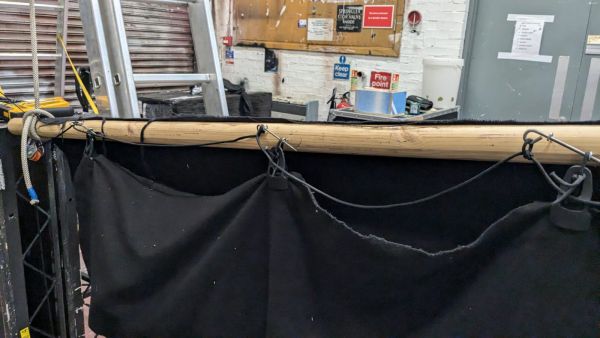
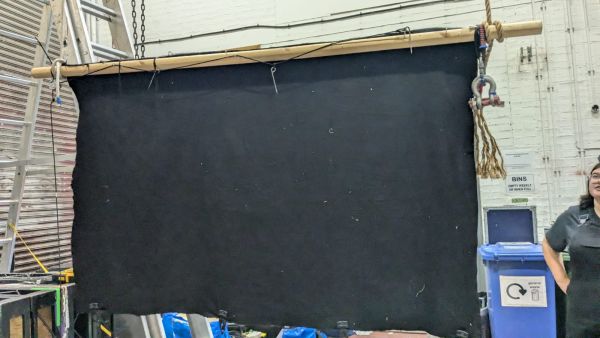
We got a rectangular piece of black tat and found a wooden pole. We used the staple gun to attach one side of the black tat to the wooden pole, and on the other side we attached 4 cyc stretchers and bits of sash tied together in small loops (as when we used larger loops they tended to get stuck around the scew eyes). We then attached 4 pins evenly along one long piece of sash in order to create a release mechanism, making sure that there was enough sash to reach down to prompt side flys. Along the wooden pole, we put in 8 screw eyes for the pins to go through, in order to hold the other side of the tat up against the wooden pole. We made sure that the second screw eye of each group was at a lower height than the first, to make sure that none of the pins accidentally fell out and released the system at the wrong time. This all works by putting a pin through one screw eye, then through one of the sash loops, then through the second screw eye, and repeating this for each of the loops along the tat.
We also added in screw eyes at each end (before the first set and just before the last set) that the release line with the pins ran through so that the line wouldn't fall when the kabuki was released.
In the end, we repeated this process twice to make three kabukis total, in differing lengths. We then flew these kabukis on two hemp points each and ran the release lines to the fly floor to be released during the show. To reset the kabukis, we could just lower them in and refill them.
Rehearsal Revolve Build
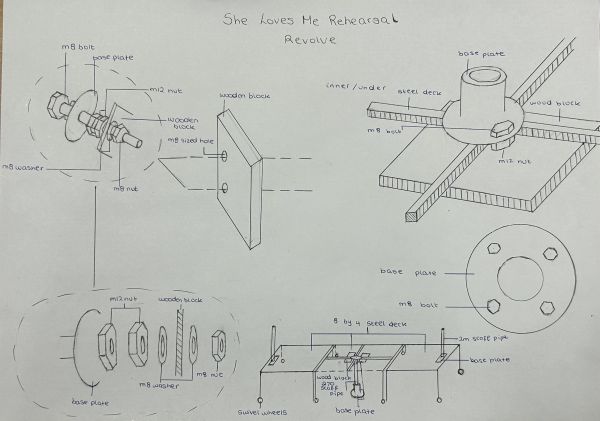
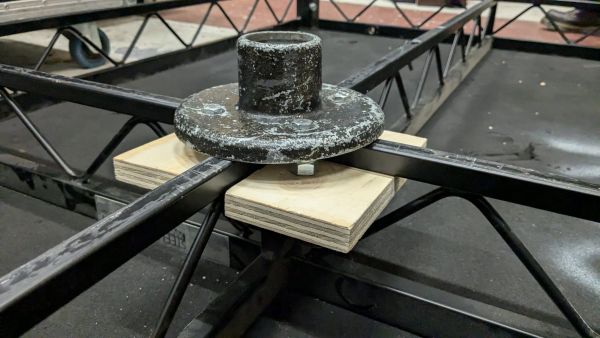
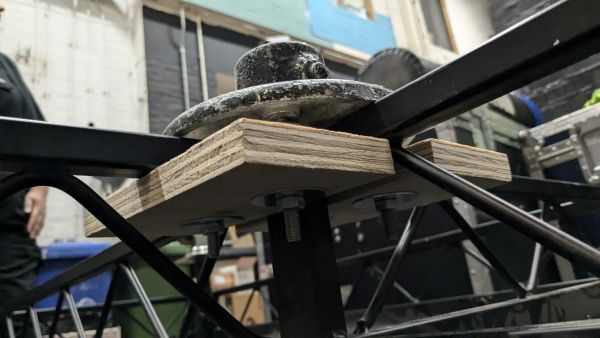
The Stage Management team requested a rehearsal revolve so that the cast could practice turning the revolve in order to work out timings. We installed the real revolve set piece in the rehearsal room for one session (to introduce the cast to it) however, it couldn't stay there permenantly as it needed to be put onstage before the rehearsals were finished and the room had to be cleared every weekend. However, we found that 3 pieces of steel deck in series was only around 10cm less than the length of the real revolve. We used wooden blocks and bolts to attach a base plate to the center of the middle steel deck. We also screwed another base plate into the floor where the center of the revolve needed to be and a short steel scaff bar between the two base plates acted as the pivot point for the revolve.
We bolted the three pieces of steel deck together and attached 8 swivel wheels on legs (4 on the central piece of deck and 2 on the outside legs of each outer peice of deck) which we borrowed from NTS. We origianlly planned to use fixed casters however we realised that we wouldn't be able to get the angles on them precice enough to ensure it revolved around the center pivot point. Despite concerns that they'd get jammed when changing directions, swivel wheels worked well.
The legs that we used with the wheels made the deck sit at around the same height as the beches on the revolve which allowed the cast to rehearse as if they were there. We also added scaff pipes on bases to either end of the steel deck to mimick where the cast would push the revolve round.
VR Vectorworks
Lighting
index.php?title=File:SLM_LX_V7.0.pdf
Practicals:
100w lamp in an frosted Victorian Lamp Housing for a streelamp.
12x 100w lamps in bauble housing constructed by props flown in for "12 Days of Christmas"
24v LED Tape inside the lightbox "Maraczek" Sign
24v LED Tape inside the cupboards in the central perfume bottle front and back to create an infinite effect.
Dimmable WW fairy lights for the christmas tree frame. 2x 10m strands to wagos.
External Hires:
6x Martin Mac Viper Performance
8x Astera Titan Tubes (placed inside the lightbox bar)
12x COLORdash Q12 Par
13x Robe CYCFX8 (lighting backdrop)
1x Data Rack with 8way sacn/artnet node and 2x 2way buffers.
Various cabling.
Kit supplied by: SLS Scotland, TallPoppy and CODA Production Services
Electrics Team:
LD: William Sheils
PLX: Gun Lai
DPLX: Jon Ross
Programmer: Smiles Ricci
Lighting Tech: Paige MacGillivray
Follow Spot Ops: Sean Jarvie, Julia Coulthard, Devin Jamieson
Sound
Sound Designer - Cara Slaughter
Sound 1 - David Kyle
PSE - Daniel Barclay
Sound 2 - Haydon Brewis
Sound Technicians - Sonny Wardrope, Emily Lumley, Skye Bell-Burn, Ravyn MacDonald
Speakers:
6 X E3 - Foldback
4 X E0 - Front Fills
2 X
2 X
2 X Minirig 2 - Music box, phone call, plate crash
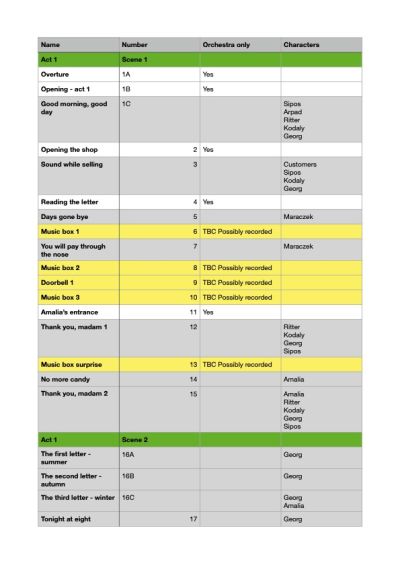
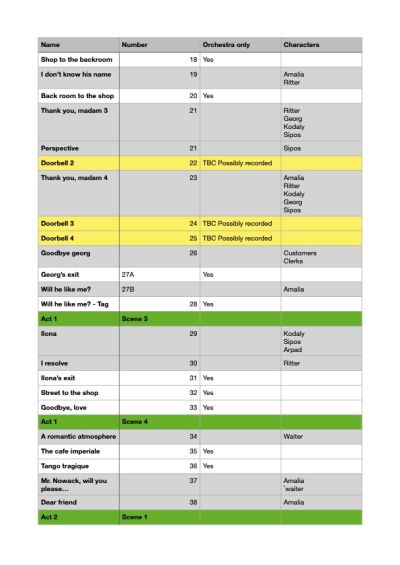
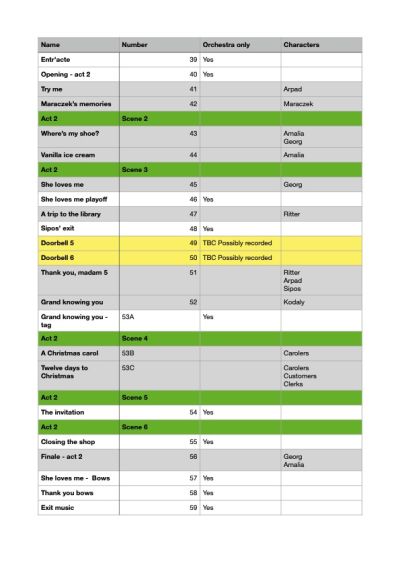
Music Breakdown
Rack Patches
Labels
Stage Management
The Stage management team consisted of Paola Soliz as the Stage Manager, Saul Johnstone as the Deputy Stage Manager and Grant Haddow, Eilidh Watt, Sal Quinlin and Roy Shearer as Assistant Stage Managers.
Paper Props
Perfume Bottles
There were various paper props that were included in this production. The main ones were the perfume boxes. Eilidh Watt created various sizes of the perfume boxes and logos for the production. They were approved by the designer and went on to be put all over the trolleys and the display shelves in the bottle.
File:Small size perfume multiple designs template (1).pdf
File:Medium size perfume multiple designs template (1).pdf
File:Long perfume bottle different designs (1).pdf
Letters
With this production there was a kabuki drop involving letters. Grant Haddow led the making of these envelopes. The process included tea dying envelopes and creating a pdf file for them to be printed on.Grant Haddow created two different sizes for these letters. There were over one hundred letters made for the drop as well as for the post box.
Props
Champagne Bottle
For the champagne bottle pop Paola Soliz and Eilidh Watt used Alka seltzer, soda water and aggressive shaking in order for us to be able to get the champagne bottle to pop.
Trick Mona Lisa Cream Tube
Materials needed:
• Toothpaste tube
• Dance floor tape
• Aluminium tape
• Logo
• Hair mousse
How to make:
1. Create a slit across the top of the tube at the back
2. Remove toothpaste and clean out tube.
3. Hot glue the normal nozzle shut
4. Cover the tube in aluminium tape
5. Cover the tube with dance floor tape and apply logo if necessary
Instructions of use:
1. Open the top of the tube
2. Insert hair mousse into the tube, wipe of excess
3. Point the back of the tube towards self
4. Squeeze hard to allow the mousse to project out
5. After use, rinse the tube out then dry
