Blood Bags Techinique
This particular method of blood bag was created for a production of West Side Story, but could be applied to a number of different situations that requires blood bags. This is a guide to how the bags were made and attached, and not a guide to making fake blood.
West Side Story has two stabbings and one gun shot. The two stabbings follow a very physical fight scene, meaning the blood bags need to be strong enough not to accidentally pop during this. However, the blood needs to be able to appear very quickly and easily when the characters are stabbed. The blood bags also need to be attached very securely to the performer so they do not fall off. They need to be small enough that they are not noticeable under clothing, however it is important that there is a lot of blood as the stabbings need to appear severe enough to have caused death.
After a number of different tests, I came to the conclusions that using strong cling film (available from Flints/art stores - not the kind from supermarkets as that's too thin) was the best way to make the blood bags. It was used in the following way...
Firstly, I cut off a section of cling film:
Next, I laid the cling film over my hand, and made a small well in the cling film in the palm of my hand. I poured the fake blood into this.
I then gathered the cling film to create a small bag.
I used a small elastic band to tie it. It needed to be fairly air-tight but left a bit of room so it wouldn't burst too easily or look too bulky. I then cut off the excess cling film.
And voila! A blood bag is created! The amount of blood can be changed depending how violent the injury is, but it is important to remember a little goes a long way.
I then needed a way of attaching this to the actors. Simply taping the bags to the actors was not secure enough. I created small pockets - around 4"x 4" - out of fairly strong white gauze material. This was done be cutting two squares of gauze, then gluing them together along three edges. I used gauze as opposed to more tightly woven material so the blood would be able to get through more easily.
This allowed me to put the cling film bags inside the gauze pockets, then tape the other edge down so it would not fall out while the actor was wearing it. I used Micropore tape to tape the gauze pockets to the actors. The first test of this method worked, however it was done during tech week so the actors had been fairly relaxed and were not too sweaty. When it was done during the run the pockets kept falling off. However, had it been another play that had been less physical this method would probably work.
As a result of this, I bought bandeau's small boob tubes in a nude colour.
I then sewed the gauze pockets to the bandeau's. This meant that the blood bags were securely in the gauze pockets, the gauze pockets were securely attached to the bandeau's, and the bandeau's were securely on the performers.
I used Pigs Might Fly blood for some shows, and S'blood - Medium/Thick for some. Both worked well; Pigs Might Fly didn't smell very much, and was darker so looked slightly more realistic. S'blood smelt stronger and was shinier, but had a better consistency.
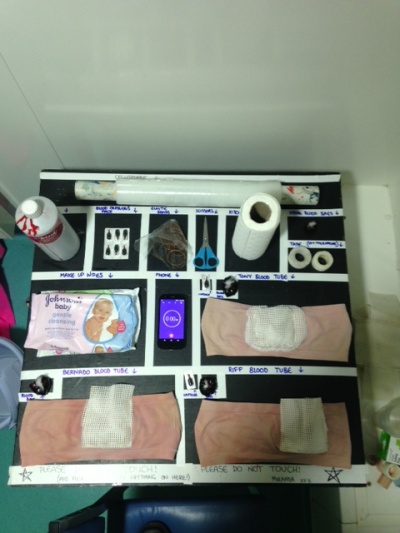
I set up a 'Blood Table' with all the equipment needed, which involved:
- Roll of cling film
- Fake blood
- Blood capsules for eating
- Rubber bands
- Scissors
- Kitchen roll
- LX tape (for taping down gauze pockets)
- Micropore tape (for keeping bandeau in place on actor)
- Baby wipes
- Timer (used my phone to make sure actors were ready within time to get back onstage for their next cue)
- Blood bags (including spares)
- Blood tubes
I set up my 'Blood Table' in the following way:
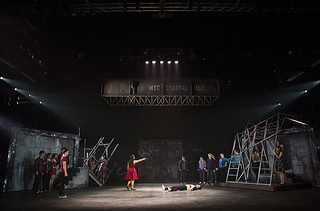
And this is how it all looked on stage...!


