Automation Class 2014: Difference between revisions
mNo edit summary |
|||
| Line 8: | Line 8: | ||
== The Scenario == | == The Scenario == | ||
The scenario we created this year was a "car" leaving its "garage", then the "garage" door closed behind itself as the "car" continued on its way to work to which it stopped, opened a "door" allowing the employee to walk through and it closes behind them. This was all achieved in one state. (The 'Going to Work State') | The scenario we created this year was a "car" leaving its "garage", then the "garage" door closed behind itself as the "car" continued on its way to work to which it stopped, opened a "door" allowing the employee to walk through and it closes behind them. This was all achieved in one state. (The 'Going to Work State') | ||
In a second state (The'Home Time'. We just reversed the scenario to return 'Home'. | In a second state (The'Home Time'. We just reversed the scenario to return 'Home'. | ||
==Equipment Used== | ==Equipment Used== | ||
| Line 64: | Line 66: | ||
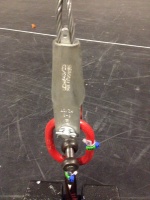
''Axis 4 was a stage weight attached to the end of the winch by a strop and a shackle.'' | ''Axis 4 was a stage weight attached to the end of the winch by a strop and a shackle.'' | ||
==How it worked== | |||
Putting the scenario into action, we needed the car to get from the garage (point A) to work (point C) by using axis 3. We choose work as point C due to an action having to take place at B so that the garage door would open automatically and close in enough time for the car to be clear of the garage door (axis 1 and axis 2). Once the car reached point c the door of the office (axis 4) would then open automatically. | |||
Revision as of 01:30, 21 March 2014
Headline text
The Scenario
The scenario we created this year was a "car" leaving its "garage", then the "garage" door closed behind itself as the "car" continued on its way to work to which it stopped, opened a "door" allowing the employee to walk through and it closes behind them. This was all achieved in one state. (The 'Going to Work State') In a second state (The'Home Time'. We just reversed the scenario to return 'Home'.
Equipment Used
Equipment Used in this scenario:
2 Divert Pulleys
2 MasterLinks
4 Wedge Sockets
4 Small Strops
1 Stage Weight
How we set it up
Firstly we brought the automation desk onto the Ath Stage. This was the best place to situate the desk because we were able to watch what the automation was doing and insuring no one walked onto the stage and was injured.
We used all four winches for this scenario and one Counterweight bar.
Each winch was given an axis, one through four. On the automation desk, so each winch would be recognizable.
Axis 1 - up stage garage door
Axis 2 - down stage garage door
Axis 3 - the car
Axis 4 - office door
Axis 1 and Axis 2 were grouped to hold a 3M length of scaffolding, acting as the garage door. By grouping Axis 1 and Axis 2 the scaffolding bar was able to fly accurately at the correct height and speed in unison in and out of the stage.
Axis 3 was named 'the car' but was in fact the mechanism to move the hypothetical car. A Zip up tower was used as the physical car. For axis 3 we ran the winch steel cable down to the Ath floor, through a divert pulley from stage left to stage right. Then was attached to the zip up tower.
Axis 4 was a stage weight attached to the end of the winch by a strop and a shackle.
How it worked
Putting the scenario into action, we needed the car to get from the garage (point A) to work (point C) by using axis 3. We choose work as point C due to an action having to take place at B so that the garage door would open automatically and close in enough time for the car to be clear of the garage door (axis 1 and axis 2). Once the car reached point c the door of the office (axis 4) would then open automatically.


