Kinesys: Difference between revisions
SMacluskie (talk | contribs) |
Kjessiman1 (talk | contribs) No edit summary |
||
| (10 intermediate revisions by 2 users not shown) | |||
| Line 5: | Line 5: | ||
'''Hardware''' | '''Hardware''' | ||
4 x Liftket 500kg 24m/min 3ph with flightcases | |||
'''4''' x Liftket 500kg 24m/min 3ph with flightcases | |||
[[File:Liftket.JPG | 150px]] | [[File:Liftket.JPG | 150px]] | ||
4 x Elevation 1+ with Flightcase | [https://www.kinesys.com/product/elevation-hoist/ Liftket Data Sheet] | ||
'''4''' x Elevation 1+ with Flightcase | |||
[[File:Elevation.JPG | 150px]] | [[File:Elevation.JPG | 150px]] | ||
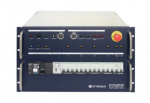
1 x Array PD-ES-T Powerlock in Flightcase | '''1''' x Array PD-ES-T Powerlock in Flightcase | ||
[[File:Array.JPG | 150px]] | [[File:Array.JPG | 150px]] | ||
1 x Rigger 8 Handset | '''1''' x Rigger 8 Handset | ||
[[File:Rigger8.JPG | 150px]] | [[File:Rigger8.JPG | 150px]] | ||
1 x Vector Keypad | '''1''' x Vector Keypad (in laptop flightcase) | ||
[[File:Keypad.JPG | 150px]] | [[File:Keypad.JPG | 150px]] | ||
1 x Vector Laptop in Flight Case | '''1''' x Vector Laptop in Flight Case | ||
[[File:Laptop.JPG | 150px]] | |||
---- | |||
'''Cables''' | '''Cables''' | ||
1 x 4' Cable Flightcase | |||
1 x E-Stop (2m Cable) | 1 x E-Stop (2m Cable) | ||
63A 3p Male CeeForm to Powerlock (2m cable) | |||
63A 5p | 63A 3p Female to Male 32A 5p CeeForm (0.5m cable) | ||
125A 3p Male to Female 32A CeeForm (3m cable) | |||
20m XLR7 Data Cable | 1 x 20m XLR7 Data Cable | ||
30m XLR7 Data Cable | 1 x 30m XLR7 Data Cable | ||
3 x 10m XLR7 Data Cable | 3 x 10m XLR7 Data Cable | ||
3 x | 3 x 10m 32A 3ph Power Cable | ||
1 x 30m 32A 3ph Power Cable | 1 x 30m 32A 3ph Power Cable | ||
30m Control Snake | 30m Control Snake | ||
== Software == | |||
'''Groups''' | |||
To operate more than one axis at a time we need to create a group for these. From the short cuts box double click the Pallets square to open a window on your screen | |||
[[File:Shortcuts.PNG]] | |||
On this page where it says name we add in what we are wanting our group to be called. This could be down stage, up stage or upstage it is up to the operator as to what they name it. After naming it click the add button and your group will pop up below with a list of all your axis beside it. | |||
[[File:Group_channel_select.PNG]] | |||
Ticking the boxes beside the axis will add this into your group you have created. | |||
Each axis can only be added into one group. | |||
After you have added all of the axis into your group click the apply button to save this and then ok. | |||
Latest revision as of 13:53, 23 July 2022
RCS Kit List
Hardware
4 x Liftket 500kg 24m/min 3ph with flightcases
4 x Elevation 1+ with Flightcase
1 x Array PD-ES-T Powerlock in Flightcase
1 x Rigger 8 Handset
1 x Vector Keypad (in laptop flightcase)
1 x Vector Laptop in Flight Case
Cables
1 x 4' Cable Flightcase
1 x E-Stop (2m Cable)
63A 3p Male CeeForm to Powerlock (2m cable)
63A 3p Female to Male 32A 5p CeeForm (0.5m cable)
125A 3p Male to Female 32A CeeForm (3m cable)
1 x 20m XLR7 Data Cable
1 x 30m XLR7 Data Cable
3 x 10m XLR7 Data Cable
3 x 10m 32A 3ph Power Cable
1 x 30m 32A 3ph Power Cable
30m Control Snake
Software
Groups
To operate more than one axis at a time we need to create a group for these. From the short cuts box double click the Pallets square to open a window on your screen
On this page where it says name we add in what we are wanting our group to be called. This could be down stage, up stage or upstage it is up to the operator as to what they name it. After naming it click the add button and your group will pop up below with a list of all your axis beside it.
Ticking the boxes beside the axis will add this into your group you have created.
Each axis can only be added into one group.
After you have added all of the axis into your group click the apply button to save this and then ok.


