|
|
| (13 intermediate revisions by the same user not shown) |
| Line 1: |
Line 1: |
| [[Image:Mortice.jpg]] [[Image:Housings.jpg]]
| |
|
| |
|
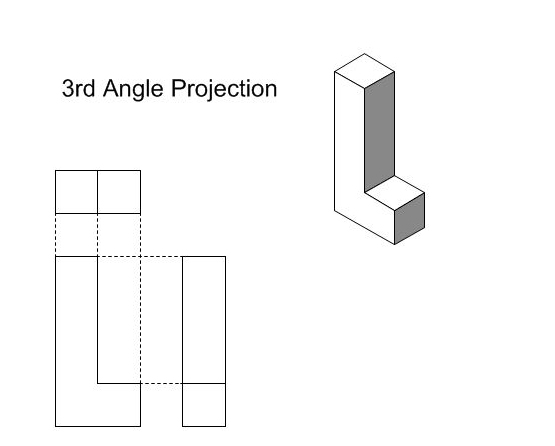
| | == 3rd Angle Projection == |
|
| |
|
| == 3 Tread ==
| | [[File:3rd_Angle_Projection.jpg]] |
|
| |
|
| The first exercise is to draw a simple independent three tread unit laid out in first angle projection.
| |
|
| |
|
| Below is an example of first angle projection. The projection lines are still visible; these lines show how sizes can be transferred from one view to another.
| | == Simple Vectorworks Drawing Example == |
|
| |
|
| For the purposes of this exercise the dimensions of the tread unit are as follows.
| |
|
| |
|
| *Overall length of treads: 2000mm
| | [[File:Arched Window Flat with Dim.jpg]] |
| *Overall height of treads: 600mm
| |
| *Width of tread: 200mm
| |
| *Height of tread: 200mm
| |
|
| |
|
| [[Image:3tread.jpg |800px]]
| | == Simple Manual Drawing Example == |
|
| |
|
| | | [[File:Manual-Arched-Window-Flat.jpg]] |
| == Arched Window ==
| |
| | |
| The second exercise is to draw a flat in first angle projection that has an arched window inset in the centre of the flat. There is an example for reference in the following pages.
| |
| | |
| For the purposes of this exercise the dimensions are as follows.
| |
| | |
| *Overall height of the flat: 3000mm
| |
| *Overall width of the flat: 2000mm
| |
| *Width of arched window: 1200mm
| |
| *Height of arched window: 2000mm
| |
| *Radius of arch: 600mm
| |
| *Height of window from base of flat: 600mm
| |
| *Thickness of flat: 25mm
| |
| *Depth of window return: 200mm
| |


